Skin Softening – Software Comparison
Although we have a number of different methods, plug-ins and applications to do “quick” skin softening for portraits, some are better than others. I am making a quick comparison of several of the quickest, most popular methods and plug-ins.
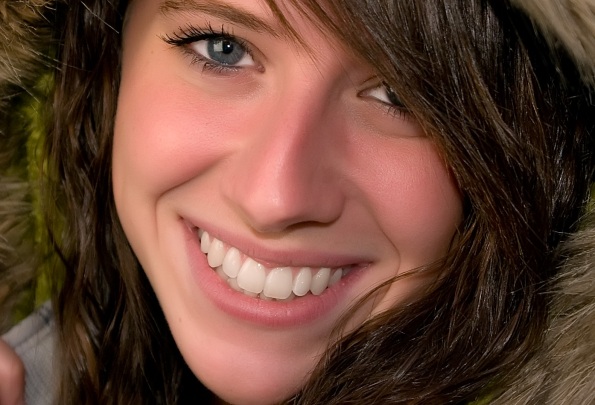
First off, here is our test image. If you watched my recent video on “10 second Teeth Whitening”, you may already recognize this image. With the level of clarity captured by modern digital cameras and lenses, this opens up a new problem, TOO MUCH detail. But how to deal with it…
Please note that the resampled images shown here are not sharp and do not clearly represent the image quality. Please click each image to see a 100% crop in a new window.
The first sample is a crop of the file before any skin retouching. And although she does not have an acne problem or other major blemishes, her pores are clear as day and their are some areas of slight discoloration.
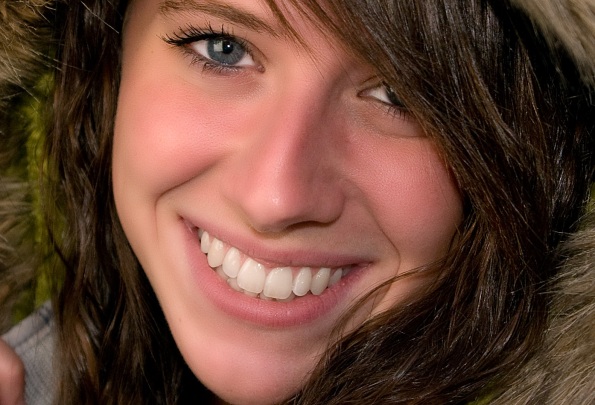
Next is a version as processed in Lightroom 2.5 and softened with the “Soften Skin” brush using default settings. (-100 Clarity, +25 Sharpening) The brush was applied to the skin only around the features. The Lightroom Soften Skin brush is a very simple, non-destructive way to edit RAW captures without causing actual pixels to be edited. (This IS the future of image editing.)
Also starting with the base file, this version was processed through Imagenomic Portraiture 2. This is a very powerful plug-in for Photoshop with many advanced features but it can be somewhat overwhelming. In Portraiture, I used the following settings (only these settings were changed from zero): Fine Details +1, Medium +3, Large +5, Threshold 20. The image mask was set to select the majority of her skin tone.
Last on the list tested for plug-in software is the Nik Color Efex Pro 3 “Dynamic Skin Softener”. This also has a fairly customizable smoothing interface similar to Portraiture but much simpler. The following settings were used in Nik CEP3: Small Details 15%, Medium 25%, Large 35%, Color Reach 15%.
In the end, the best option is the one that is available to you and suits the image you are working on. And of course the effect of any of the above options can be toned down or even ran with a higher level of softening applied if desired. The settings chosen were roughly the same level of softening for comparison sake. Any of the above options CAN and WILL “plasticize” a person if used at too high of a level.
Their are a few other software solutions available and a number of different manual techniques to do skin softening but I do believe these are the most popular three options as far as software and any manual technique would have differing results based on skill level and would take much more time; this is a comparison of quick retouching methods.


Very helpful information here,
Thank you